
Envelope Art - Floral Borders
Got mail to send? Have you thought about decorating the front (and back) of that envelope? How many times have you seen a beautifully decorated envelope and thought to yourself, "That's gorgeous!" but stopped because it either looked too difficult or time consuming? Well, envelope art can be as simple as putting some creative lettering on the front or complex with intricate flourishes and designs. This class is about finding that middle ground with floral borders that you can easily create a handful at a time and have envelopes ready to address and mail!
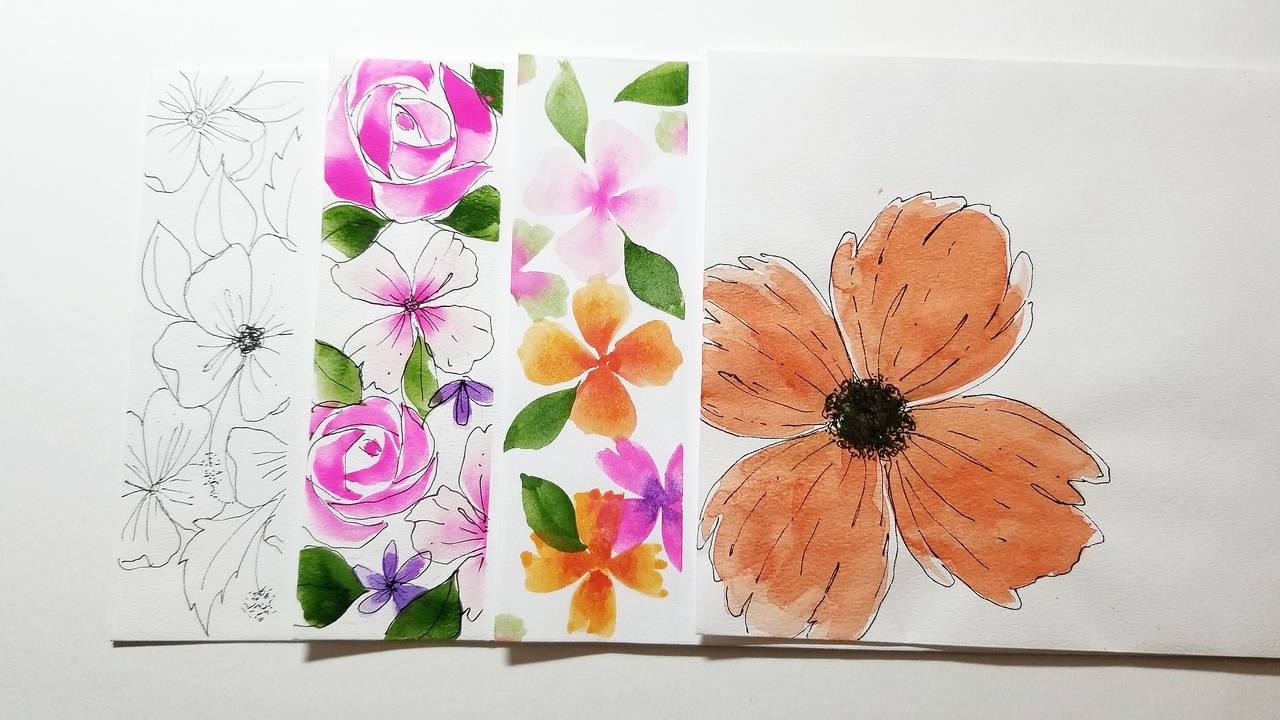
Topics Covered
- Examples
- Finding inspiration from what is inside the envelope
- How to decant watercolors from your pans to a palette
- A large loose floral element on one corner (front and back) and outlining it to make it pop
- Using masking tape to create a border
- How to use a wedge brush and a round brush for each floral element
- How to create a floral border with just paint and another with outlines and a last one without any paint
- How to create my signature rose
Want to join us for class? It's offered on-demand and available now for all Tier 2 students. Some classes are also available to Tier 1 students. Click here to see the Tier 1 Class Listing.
How to Access Your Members-Only Class:
- Go to www.kallicampacademy.com
- Log in to your account
- Click on Classroom
- Click on Tier 2 -- Class Archive
- Click on Snail Mail and Envelopes
Materials Needed
- Envelopes (I like the watercolor envelopes from Strathmore but I have included a template so that you can create your own watercolor envelopes using the watercolor paper that you prefer. I usually order my colored envelopes from Envelopes.com)
- Paintbrushes (Wedge / Triangle and/or Round - various sizes)
- Watercolors (pans or tubes) and/or Gouache
- Palette (ceramic or plastic)
- Water (several jars - visit Tip Me Tuesday #7 for more info)
- Micron pen (01. 03 or 05), Gelly Roll Stardust, pencil and eraser
- Straight edge ruler (to help measure how much space you need for lettering before putting down the masking tape) and a circle template or something round (3-4" in diameter).
Homework Challenge
Want to see our students' homework? Search the hashtag #KCAEnvelopeArt on Instagram to see samples from this week's homework. Our students who participate in this challenge get entered into a drawing to win prizes.
Instructor: Jane Matsumoto

Website: www.ginkgoarts.com
Instagram: @ginkgoarts
Facebook: @ginkgoarts
Download our Master Supply List FREE when you become a Friend of the Academy.

Categories
All Categories