
Prepare Invitations for Printing
Class Intro
Now that you have designed your wedding invitations, it’s time to get them ready to submit for the printer. Not sure where to start? We’ve got you covered. This class by Allison McClanahan @wildwoodcalligraphyandpost takes you through setting up your artwork for the printer using Adobe Photoshop.
Want to join us for class? It's offered on-demand and available now for all Tier 2 students. Some classes are also available to Tier 1 students. Click here to see the Tier 1 Class Listing.
How to Access Your Members-Only Class:
- Go to www.kallicampacademy.com
- Log in to your account
- Click on Classroom
- Click on Tier 2
- Scroll to Current Classes
Topics Covered
- Create and work within a Photoshop file
- Margins
- Safe Zones
- Changing the color of calligraphy
- Saving the file so it is printer ready
Plus:
- Shortcuts for those who don't do artwork or calligraphy, or both!
Supplies
- Calligraphy invitation design you have already scanned or have created in Pr ...
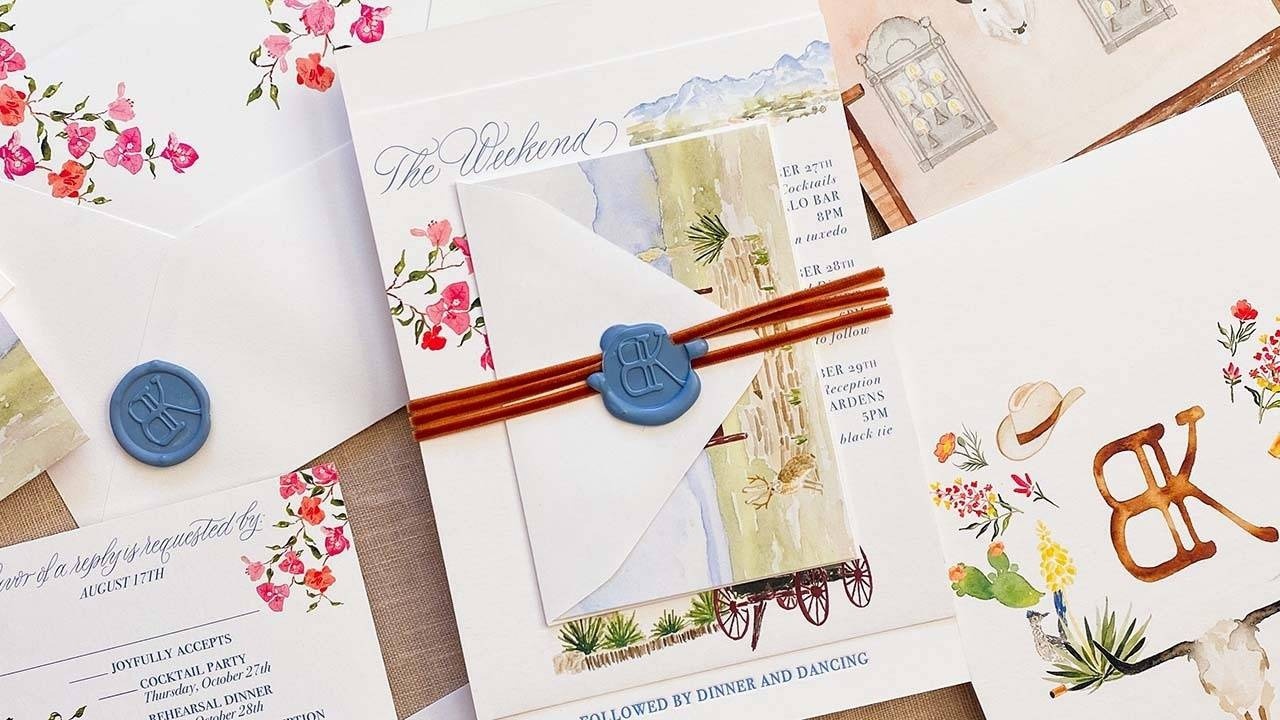
Design a Wedding Invitation Suite
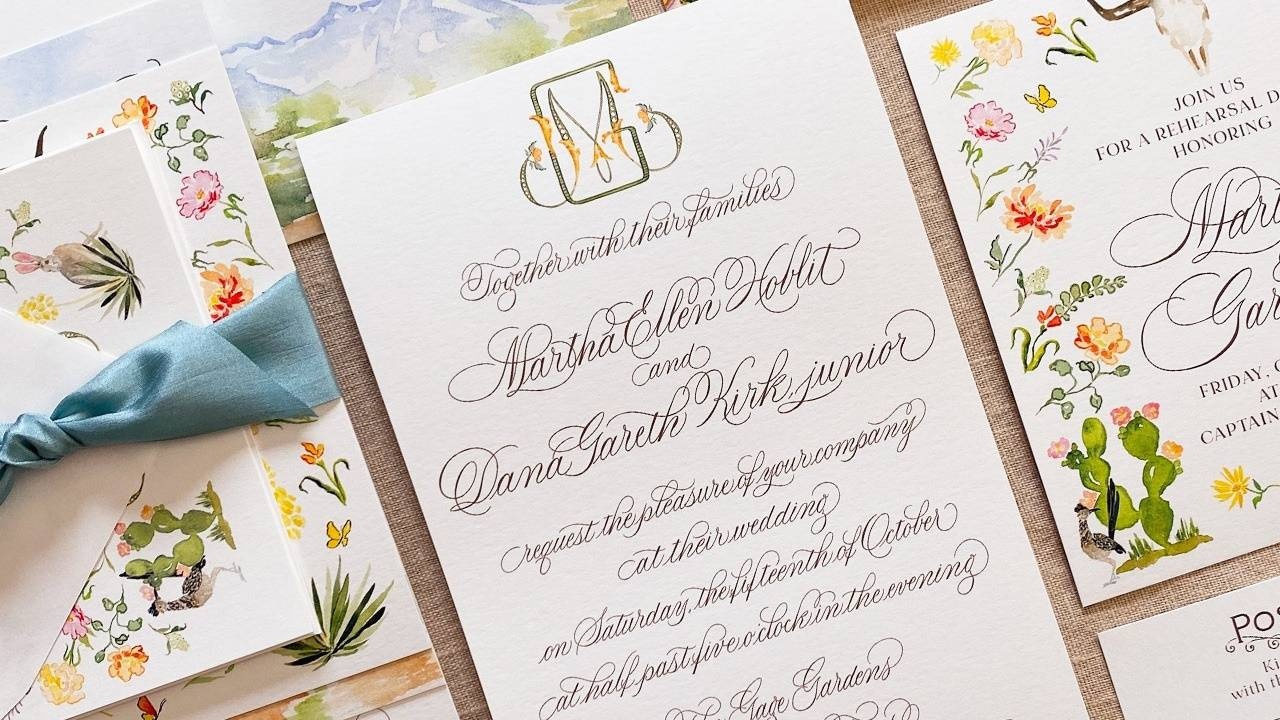
No more turning down wedding invitation jobs because they seem over your head!
We are taking the mystery out of stationery design and giving you all the tools you need for quick and easy design and production. Join us for our 3-part Invitation Suite Design Series taught by Allison McClanahan, a bespoke stationery designer and calligrapher.
Our first class started with designing a watercolor crest, teaching you how to create stationery artwork and digitize it for printing. In Part 2 you will learn all the ins and outs of the wedding invitation suite.
We’re talking paper sizes, paper types and colors, printing methods, wording and etiquette, layouts and artwork ideas, and all the bells and whistles to add. Did someone say ribbons and wax seals? Allison takes you in to her tried-and-true design process and walks you step by step through how to work with wedding clients from start to finish.
You’ll learn about creating look books, what to use for design inspiration, and where ...
Creating Wax Seals and Tying Ribbons
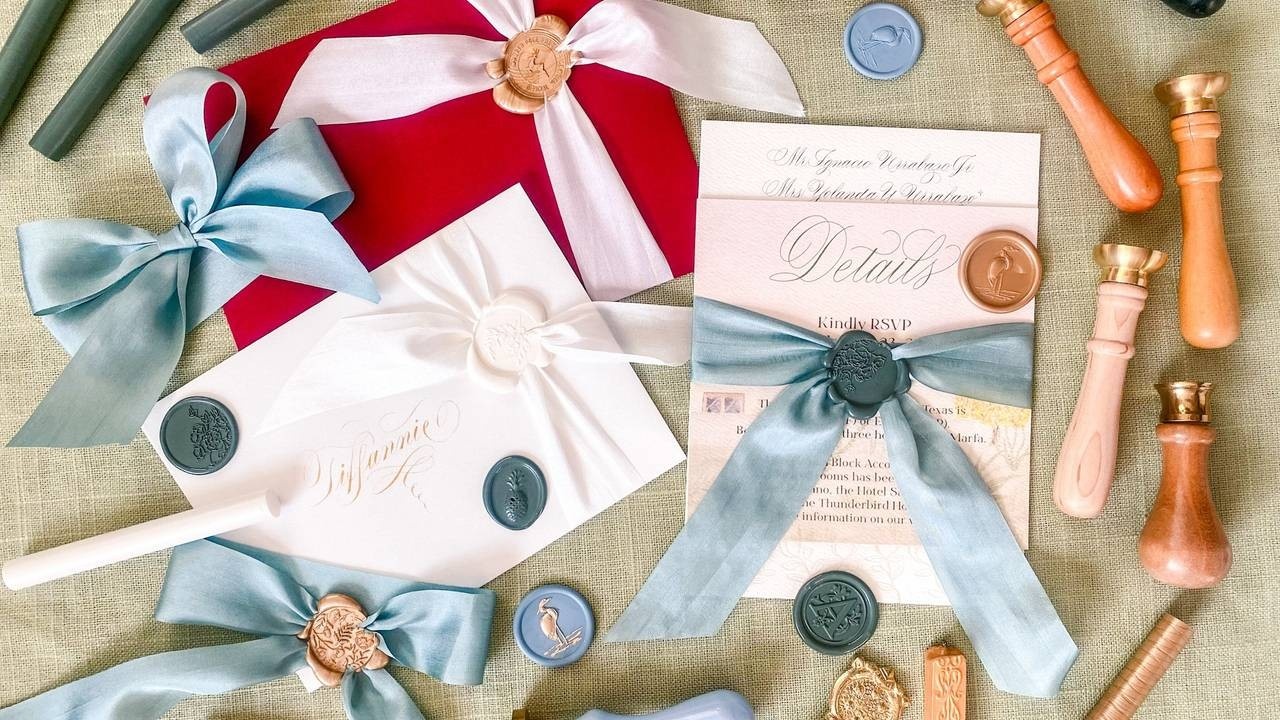
My name is Allison McClanahan, and I am a calligrapher and stationer. For my wedding clients, I work with ribbon and wax seals which makes a piece of mail extra fun to receive. In this class, I’ll show you my favorite methods for creating wax seals and tying ribbons.
Topics covered
- Wax and sealing stamps sourcing
- Ribbon sourcing
- Gold marker brand
- Wax seal formation--various methods and shapes with a focus on the glue gun method
- Ribbon/wax seal combinations
- opposite direction tails
- same direction tails
- Ribbon tying
- knot
- bow
- How to keep your wax seal and ribbon from attaching to the paper
Want to join us for class? It's offered on-demand and available now for all Tier 2 students. Some classes are also available to Tier 1 students. Click here to see the Tier 1 Class Listing.
How to Access Your Members-Only Class:
- Go to www.kallicampacademy.com
- Log in to your account
- Click on Classroom
- Click on Tier 2 -- Class Archive
- Click on Hand/Paper Crafts
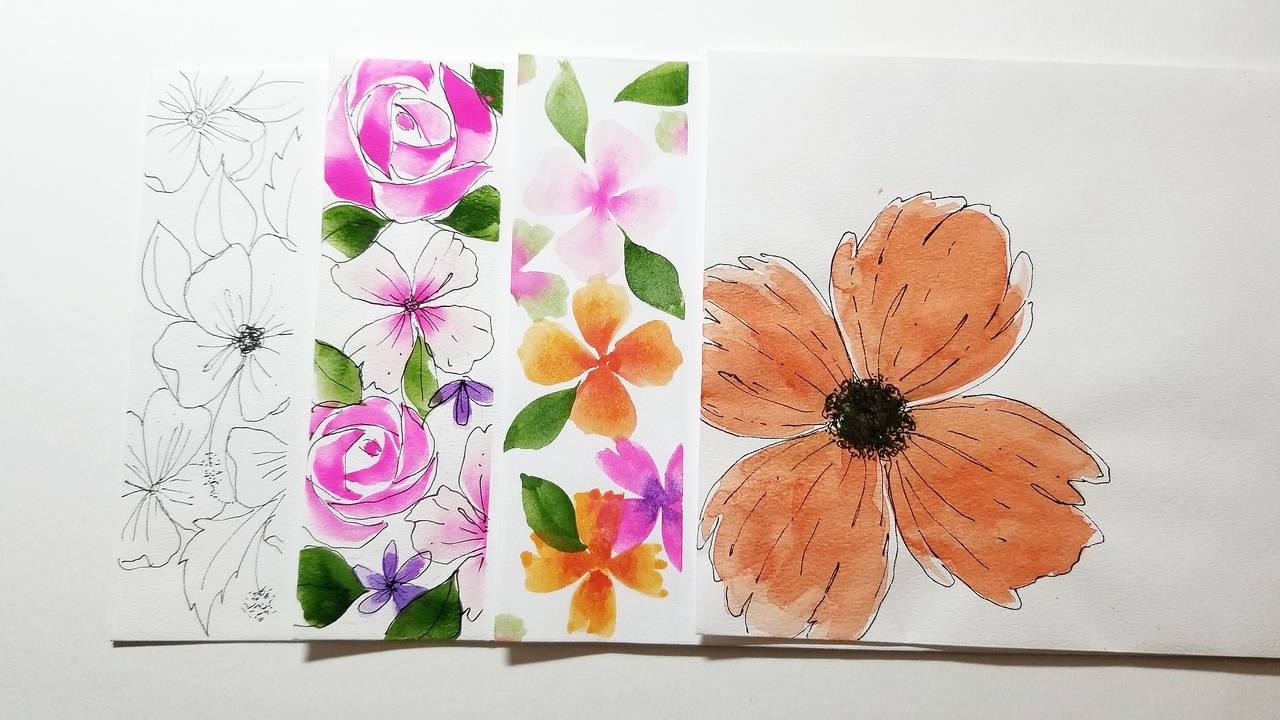
Watercolor Leaves and Florals Pop-up Card
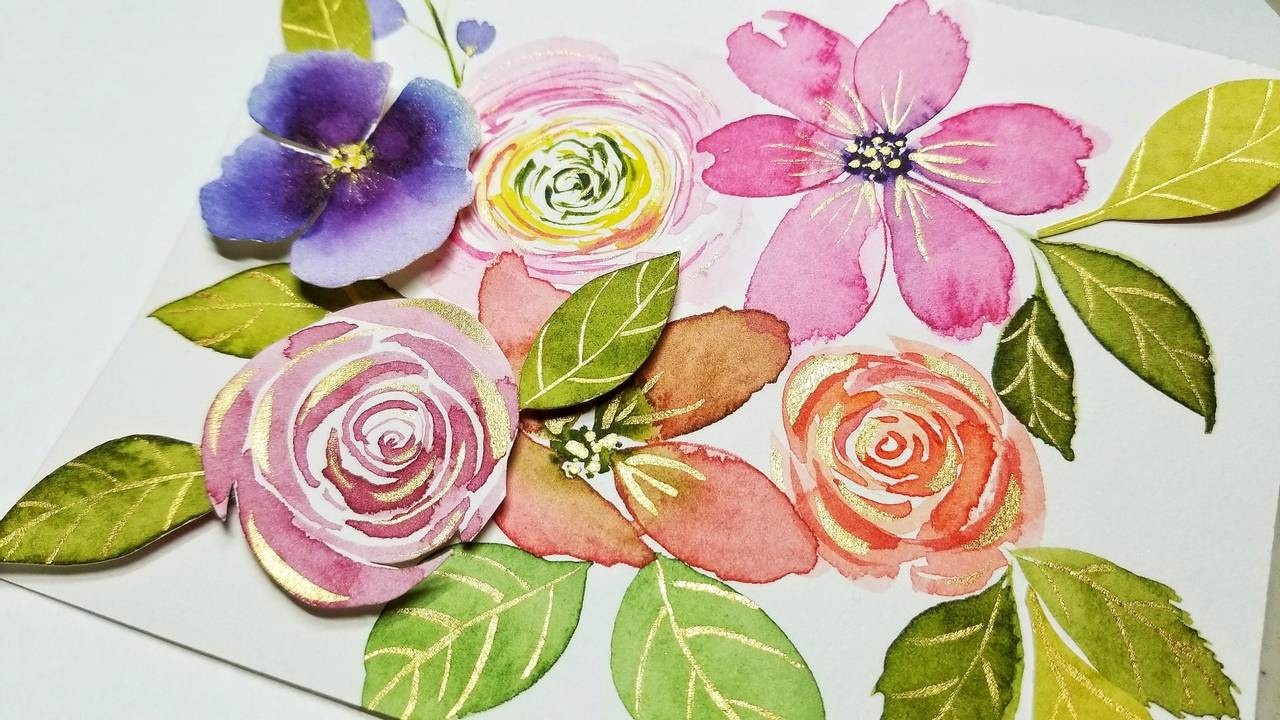
Make a splash of brightly colored leaves and florals to bring a little happy to your work space or send to someone else. We will start with a step-by-step process of creating each of these different designs with watercolors. You’ll learn some special techniques for painting florals, how to give them an extra sparkle with gold paint, and how to get a layered pop-up effect for a 3-D card that will wow the recipient.
Want to join us for class? It's offered on-demand and available now for all Tier 2 students. Some classes are also available to Tier 1 students. Click here to see the Tier 1 Class Listing.
How to Access Your Members-Only Class:
- Go to www.kallicampacademy.com
- Log in to your account
- Click on Classroom
- Click on Tier 2 -- Class Archive
- Click on Watercolor and Painting
Materials Needed
EK Success Cutter Bee Precision Scissors
Addressing Envelopes with Calligraphy
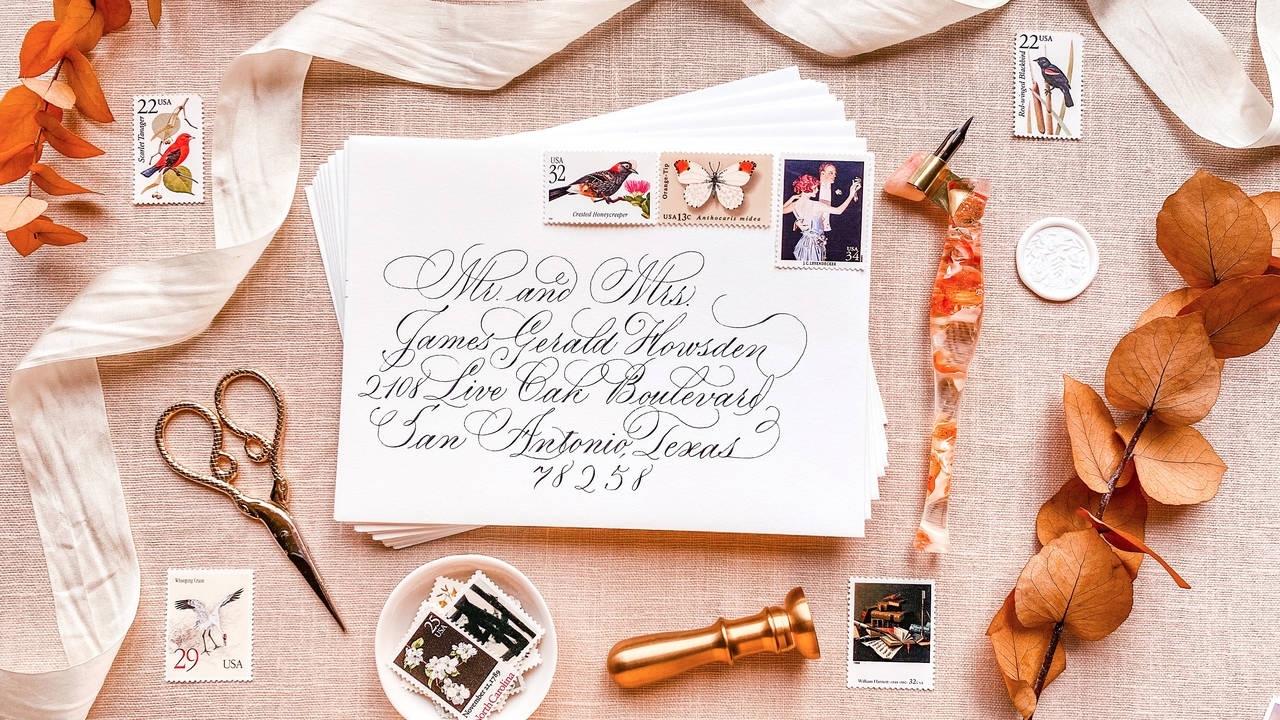
Calligraphy on envelopes! This is what drew me to calligraphy in the first place, and it is still my very favorite thing to do.
Topics Covered:
- Consistency in letter forms
- Using a Lightbox with your favorite guidelines
- Using a Phantom Liner
- Judging your spacing for centering
- Common addressing anxieties
- Flourishing to take up space/balance
- Knowing where to start on your envelope
- Suggestions for talking to clients about postage
- And other resources and tips spread throughout!
Want to join us for class? It's offered on-demand and available now for all Tier 2 students. Some classes are also available to Tier 1 students. Click here to see the Tier 1 Class Listing.
How to Access Your Members-Only Class:
- Go to www.kallicampacademy.com
- Log in to your account
- Click on Classroom
- Click on Tier 2 -- Class Archive
- Click on Snail Mail and Envelopes
Materials Needed:
• Envelopes. I recommend Paper Source and Cards and Pockets for smooth quality envelope...
Envelope Art - Floral Borders
Got mail to send? Have you thought about decorating the front (and back) of that envelope? How many times have you seen a beautifully decorated envelope and thought to yourself, "That's gorgeous!" but stopped because it either looked too difficult or time consuming? Well, envelope art can be as simple as putting some creative lettering on the front or complex with intricate flourishes and designs. This class is about finding that middle ground with floral borders that you can easily create a handful at a time and have envelopes ready to address and mail!
Topics Covered
- Examples
- Finding inspiration from what is inside the envelope
- How to decant watercolors from your pans to a palette
- A large loose floral element on one corner (front and back) and outlining it to make it pop
- Using masking tape to create a border
- How to use a wedge brush and a round brush for each floral element
- How to create a floral border with just paint and another with outlines and a last one without any p ...
All Things Snail Mail - From Postage to Envelope Liners

Sending old fashioned letters through the mail is a beautiful way to use your calligraphy. It brings joy to the receiver, and is relatively inexpensive! It can be so much fun, but you can't necessarily just stick any stamp on any envelope... different ink requires different postage amounts as does different weights, sizes, and even lumpiness! Then what do you actually put into the letter? It may be easy to write a page (or four!) to your best friend, but what if you want to send mail to someone you don't know well (like in the KCA Snail Mail Database)? I have you covered in this class.
Topics Covered
- Postage- how much it costs to mail a letter and what costs extra
- What to put inside the envelope, especially if you don't know the recipient well
- Some formal etiquette do's and don'ts
- How to make an envelope liner
Want to join us for class? It's offered on-demand and available now for all Tier 2 students. Some classes are also available to Tier 1 students. Click here to see the ...
Download our Master Supply List FREE when you become a Friend of the Academy.

Categories
All Categories