
How to Create Books with Japanese Stab Binding
Have you ever thought about learning to bind or start book binding and felt overwhelmed by not just how many types there are out there, but by the supplies required to make some of them happen? I have one for you today, that is perfect for someone who wants to try binding without having to invest in a lot of tools or time.
There are many different types and techniques of binding and book binding available. They range from being simple to complex and have various looks and functionality. Many require supplies like boards, clamps, glue, cloth, etc. on top of the basic binding supplies. The most versatile of these is Japanese Stab Binding. It is a simple binding technique that requires just a handful of supplies. You can use any type or paper and even mix/match materials. The only requirement is that the material has to be cut to the same size. No folding or gluing required!
You can use this technique to create your own calligraphy or watercolor journals, photo albums or scrapbooks, diaries, or to bind a collection of things like envelope art and happy mail!
Let's get started!
Topics Covered
- Supplies needed
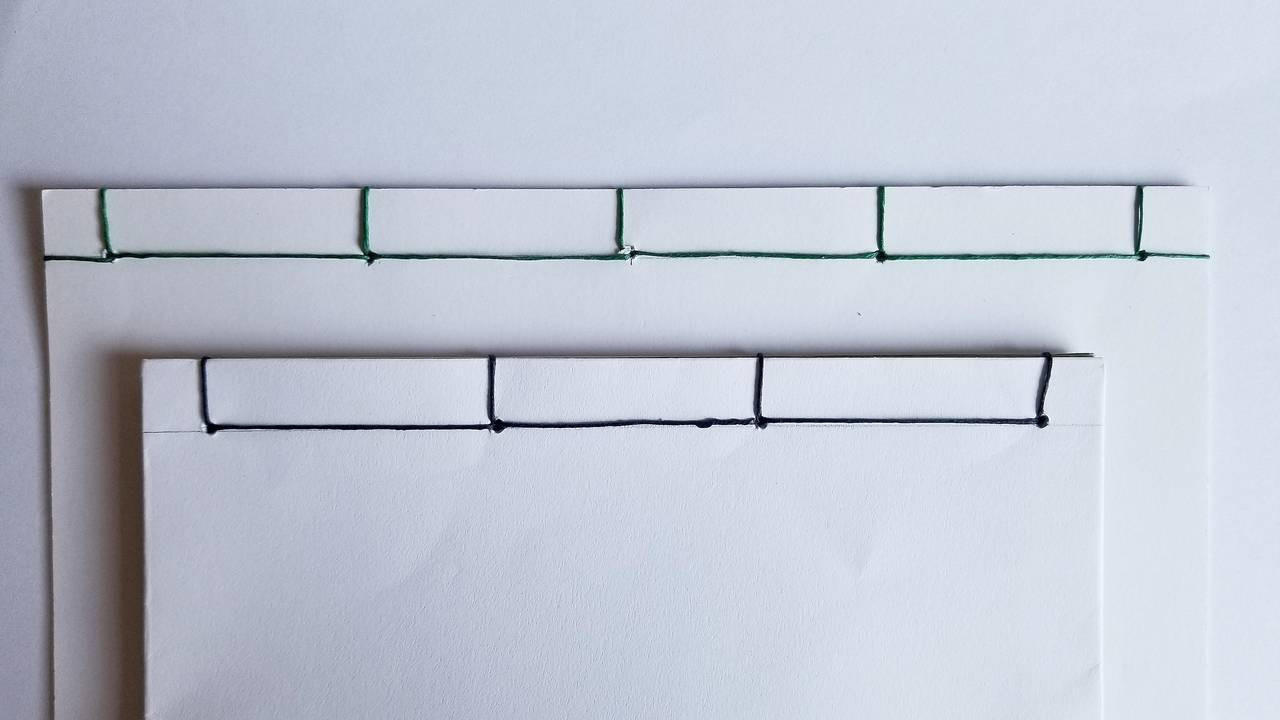
- What Japanese Stab Binding looks like (samples)
- How to tear paper without a paper cutter
- How to space out the holes for punching
- How to create holes using a tapered awl
- How to measure out thread
- How to create a journal using Japanese Stab Binding technique
- How to bind a collection of envelopes using the technique
Want to join us for class? It's offered on-demand and available now for all Tier 2 students. Some classes are also available to Tier 1 students. Click here to see the Tier 1 Class Listing.
How to Access Your Members-Only Class:
- Go to www.kallicampacademy.com
- Log in to your account
- Click on Classroom
- Click on Tier 2 -- Class Archive
- Click on Hand/Paper Crafts
Materials Needed
Binding Supplies
- Cutting mat or something to protect your work surface
- Needle (doll, bookbinding, or embroidery) that has an eye that is not larger than the body and the eye is large enough to easily thread waxed linen thread through (I will be using a 3.5" long doll (darning) needle)
- Waxed Linen Thread or embroidery thread (I will be using waxed Irish linen thread from Volcano Arts)
- Awl - tapered is best, but a straight body awl will work (I will be using a white Clover tapered awl #3437-035)
- Scissors
- Pencil
- 12" Ruler - metal is better but plastic/acrylic will work
- Decorative paper (designer paper, scrapbook paper, handmade paper, marbled paper, Japanese rice paper) cut to match your preferred size of paper (I will be using hand-marbled paper from Jane Doherty on Etsy - MissHellebore)
- Paper - 7-8 pieces of -32# printer paper, 5-6 pieces of +40# text weight paper, 3-4 pieces of +140 watercolor paper, cut to your preferred size for a journal (My sample will be 6" x 9" using 90# Sulphite drawing paper)
- Envelopes of your choice, decorated or plain (I will be using five colored envelopes (5 1/4" x 7 1/4") sandwiched between two white (5 1/4" x 7 1/4") envelopes for my front and back.
- Binder clips (2-4 medium or small)
Optional supplies:
- Bone folder if you choose to fold your paper instead of cutting or tearing them
Homework Challenge
Want to see our students' homework? Search the hashtag #kcabinding on Instagram to see samples from this week's homework. Our students who participate in this challenge get entered into a drawing to win prizes.
Instructor: Jane Matsumoto

Instagram: @ginkgoarts
Facebook: @ginkgoarts
Download our Master Supply List FREE when you become a Friend of the Academy.

Categories
All Categories