
Designing a Hanuka Postcard

In this class, you'll learn to design your very own hand-painted and embellished postcard using gold leaf, watercolors, and a little ancient history. You'll get a quick background on the menorah motif, as well as a thorough tutorial on gold leaf application and some beginner watercolor techniques. Calligraph a short message on the back of your postcard and ship it off to a loved one who celebrates the Festival of Lights to illuminate their day!
Topics Covered:
- Gold leaf for illustrative elements & calligraphy
- Wet on dry watercolor technique
- Ancient art history context
- Appropriate holiday greetings
Want to join us for class? It's offered on-demand and available now for all Tier 2 students. Some classes are also available to Tier 1 students. Click here to see the Tier 1 Class Listing.
How to Access Your Members-Only Class:
- Go to www.kallicampacademy.com
- Log in to your account
- Click on Classroom
- Click on Tier 2 -- Class Archive
- Click on Holiday Calligraphy Camp
How to Draw a Flourished Snowflake with Pointed Pen
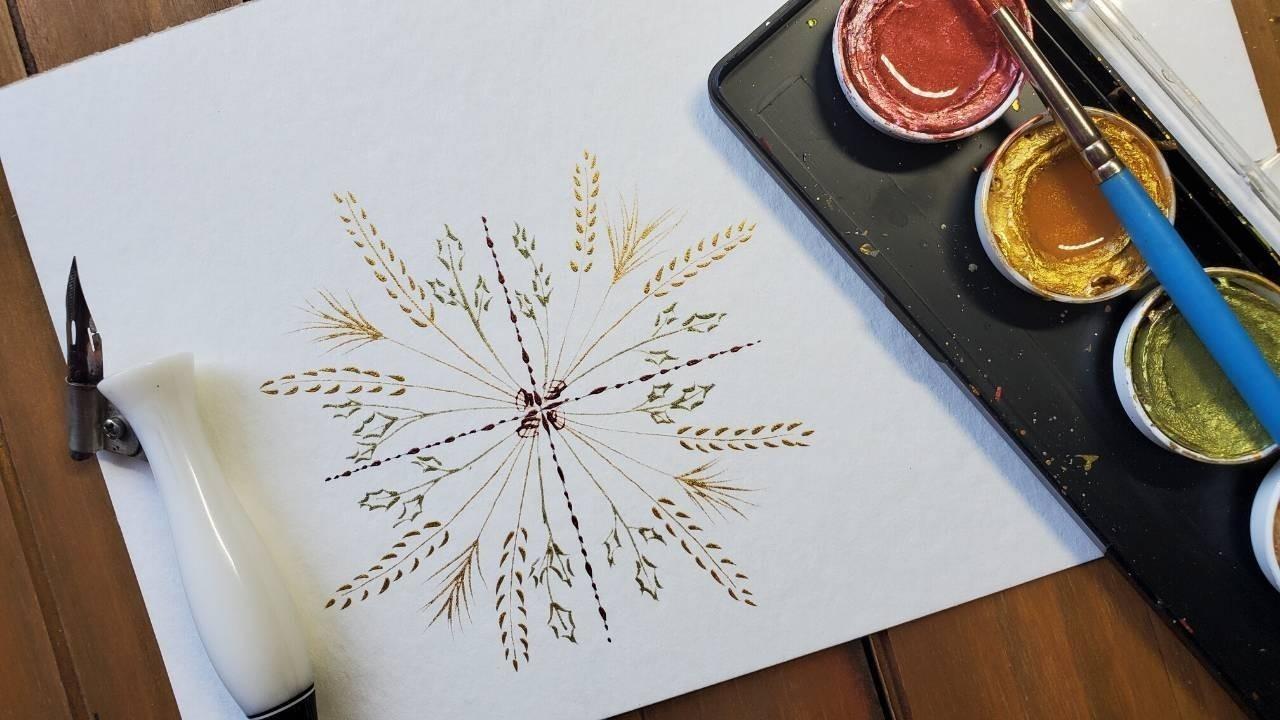
Nothing says Christmas or the Holidays like a beautifully flourished snowflake. In this lesson, you will learn fun ways to flourish and design decorative and festive elements so you can create beautiful snowflakes to write on your holiday cards and envelopes. There's also a fun bonus lesson at the end, so stay tuned!
Topics Covered:
- How to create a radial flourish
- How to use watercolors for pointed pen calligraphy
Want to join us for class? It's offered on-demand and available now for all Tier 2 students. Some classes are also available to Tier 1 students. Click here to see the Tier 1 Class Listing.
How to Access Your Members-Only Class:
- Go to www.kallicampacademy.com
- Log in to your account
- Click on Classroom
- Click on Tier 2 -- Class Archive
- Click on Holiday Calligraphy Camp
Materials Needed:
- pointed nib
- oblique or straight nib holder
- ink of your choice
- pen or pencil
- ruler
- water
- eyedropper
- pearlescent watercolor, colored inks, or goua ...
How to Hand-Letter Different Types of Ornaments
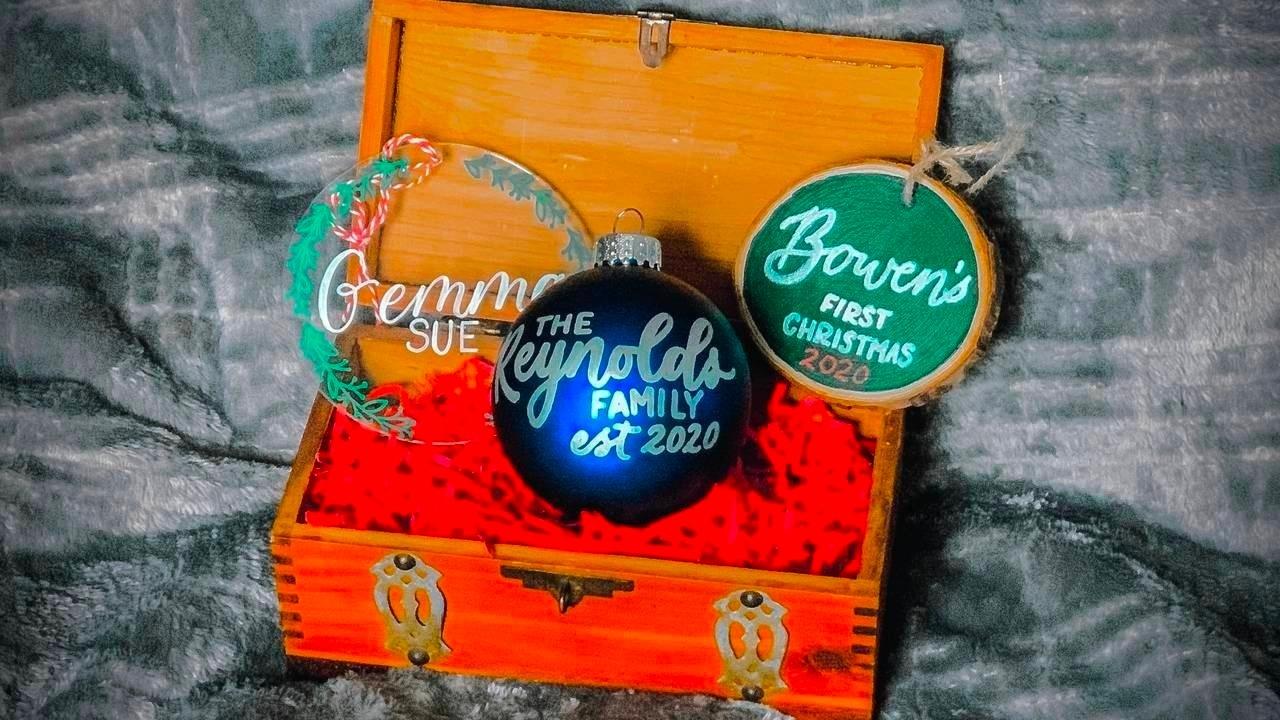
After joining in on this class, you’ll be well equipped to tackle ornaments for your own personal enjoyment, a sweet personalized gift, or even for your business needs!
Topics Covered:
- Materials needed for a successful ornament personalization
- Tips for writing on glass, acrylic, and wood ornaments
- Ideas for different types of ornaments and their wording.
Want to join us for class? It's offered on-demand and available now for all Tier 2 students. Some classes are also available to Tier 1 students. Click here to see the Tier 1 Class Listing.
How to Access Your Members-Only Class:
- Go to www.kallicampacademy.com
- Log in to your account
- Click on Classroom
- Click on Tier 2 -- Class Archive
- Click on Holiday Calligraphy Camp
Materials Needed:
Wood Slice Ornament:
- Wood slice with hole drilled (I purchase mine from Hobby Lobby but Amazon and many DIY/craft stores carry them)
- Craft paint
- Paint Pen (Sharpie, Posca, or Sakura Pen Touch all work well)
- Ri ...
How to Paint Watercolor Wreaths
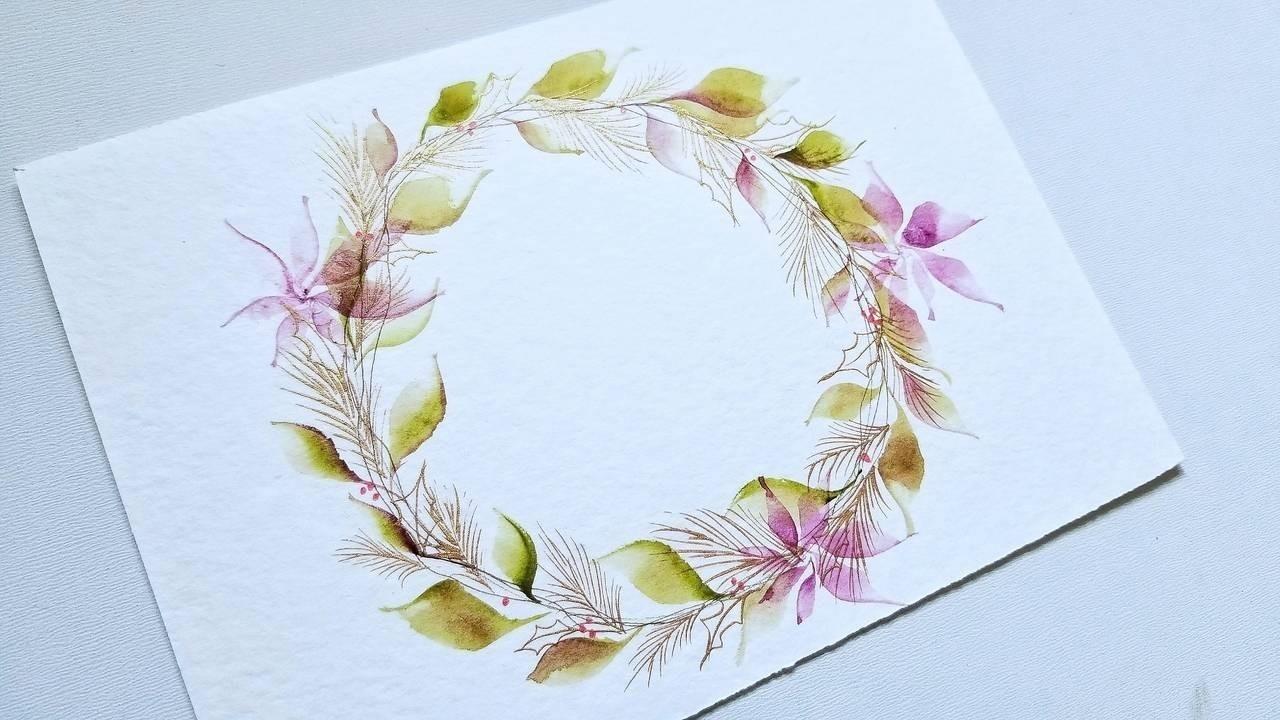
Nothing says "Welcome and Merry Christmas!" than a holiday wreath hanging on a front door. Wreaths exude a sense of joy and a desire for peace, as its circular shape symbolizes unity and never ending love and life. Spring and Summer wreaths represent new life and growth. Autumn wreaths represents change and the circle of life. Christmas wreaths have deep and symbolic religious meaning, but over time, have come to represent the spirit of Christmas and the holidays. For me, leaves represent the tree of life, symbolizing health and growth, the pine needles represent peace (the Tree of Peace), the holly leaves represent hope, and the poinsettia represents good cheer. We will be combining all four elements to create a beautiful Christmas wreath, using watercolor techniques that you can use to make holiday cards and decorate envelopes.
Topics Covered:
- Creating leaves and poinsettia petals
- Creating pine needles
- Creating holly leaves
- Revisiting all four elements
- Step by step waterco...
How to Create and Sell Santa Letters
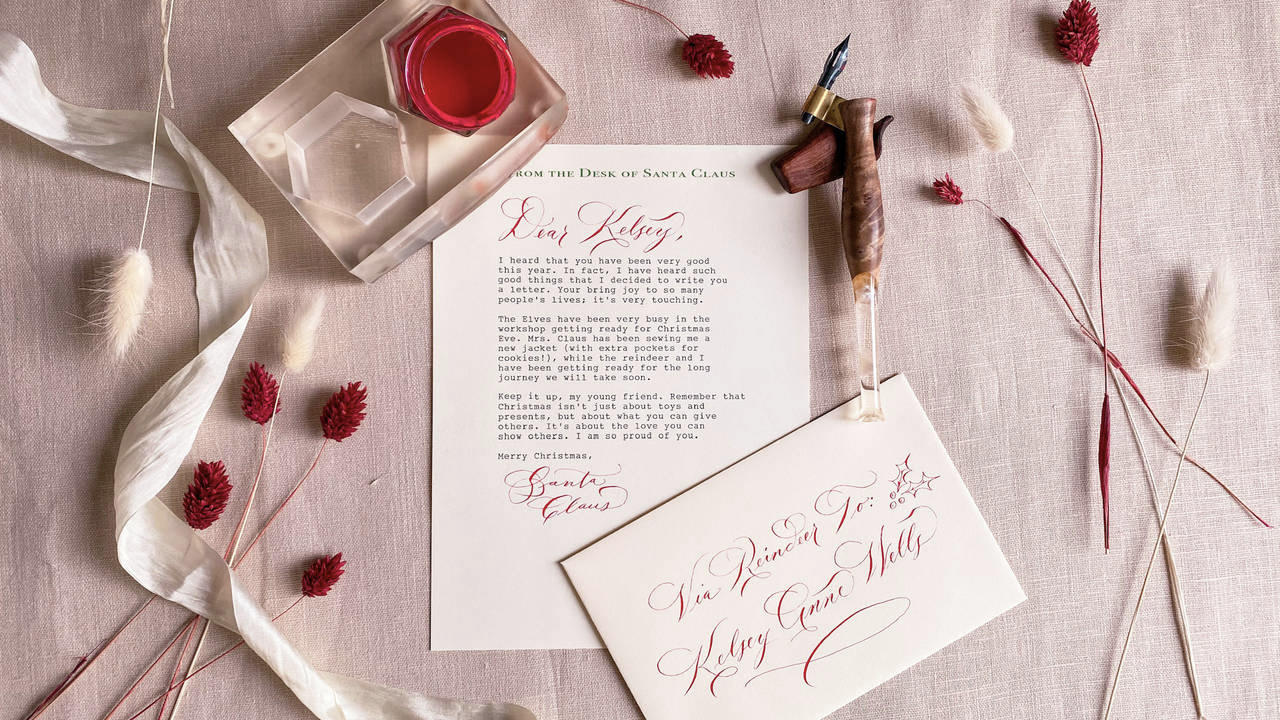
Have you ever found yourself wondering how to make a little extra money with your calligraphy around the holidays? We are going to talk about one of the best (and one of the easiest) ways calligraphers can earn money for Christmas and that’s Santa Letters. In this video, Allison will go over all the basics of how she puts together these Santa Letters and some things to think about to make selling them a bit easier. The tips you will learn in this class will help you in any situation where you are doing live calligraphy and selling items, like at a craft fair.
Topics Covered
- How to Make Santa Letters
- How to Price Your Santa Letters
- How to Do Live Calligraphy at a Craft Fair
- How to Use Gouache for Calligraphy
Want to join us for class? It's offered on-demand and available now for all Tier 2 students. Some classes are also available to Tier 1 students. Click here to see the Tier 1 Class Listing.
How to Access Your Members-Only Class:
- Go to www.kallicampacademy.com
- Log in...
Download our Master Supply List FREE when you become a Friend of the Academy.

Categories
All Categories